This tool is a NextGenUpdate Elite exclusive!
![]()
Hey guys, here is a Tutorial on how to use MzTool. Most of it is pretty self explanatory, but I will still be going over everything and explaining how to use all of the features of this tool. So lets get straight in to it!
NOTE: MzTool is available for free if you have NGU Elite.
First of all, for full use of this tool you must have CCAPI V2.50 installed on your PS3. There are many tutorials around on how to do this, so if you haven't already... install CCAPI V2.50.
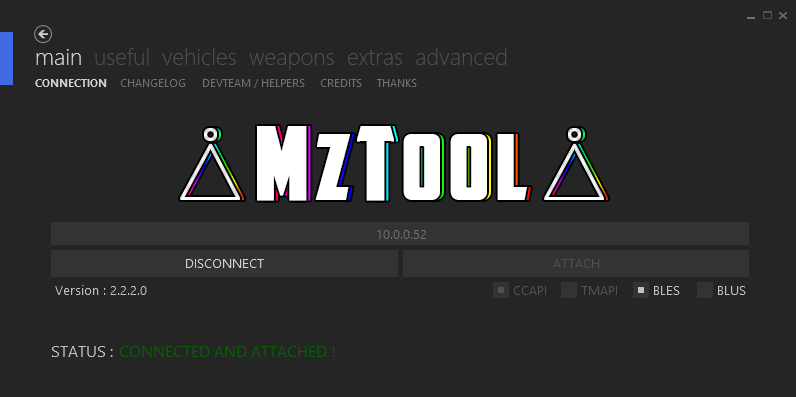
Once you have entered your username and password, you will be prompted to enter your PS3's IP address. Once you have entered your IP hit the CONNECT and ATTACH buttons. MzTool is now ready to use.
Navigate your way to the "useful" tab. This tab contains many useful mods when it comes to modding GTA V. The useful tab is very simple to use.
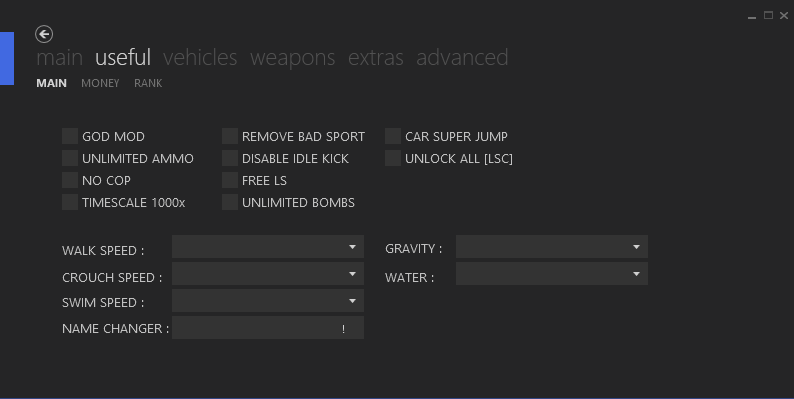
Lets start with the MAIN tab... there are many options in the MAIN tab. For the checkboxes, simply click them to activate them (it will be ticked if the mod is turned on), and click it again to deactivate the mod. There are also drop down menus where there are many options. Click on the drop down menu to see the options, select one and the mod will be active in game. As for the name changer option, you can type the name of someone else in your session in that box and hit the "!" button to change your name. NOTE that only you can see that your name has changed, but the game will think that you are now this player. Play around with this, you can do things like give cars away etc, it's just a matter of experimenting.
![]()
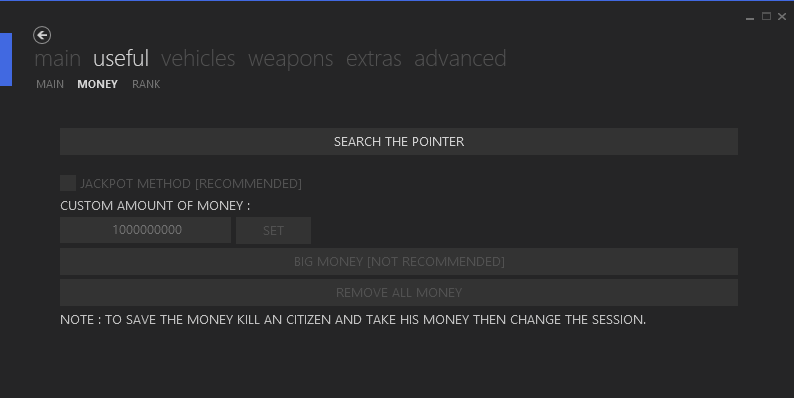
Next comes the MONEY tab. Be cautious when modding money into the game, there are ways that can be detected by Rockstar and you could potentially be banned. The first thing you need to do once you are in the MONEY tab is to click the "SEARCH THE POINTER" button. Once the pointer has been found, you are free to mod the money into the game. My recommendation is that you use the "JACKPOT METHOD". By using this method, your GTA V Online account gets sent $10,000 at a time. This means it is much less detectible and lessens the chance of receiving a ban. The other button, "BIG MONEY", gives you a lot of money instantly. Rockstar can detect this easily and you will most likely get banned. This method is NOT recommended, but in the end it's up to you.
![]()
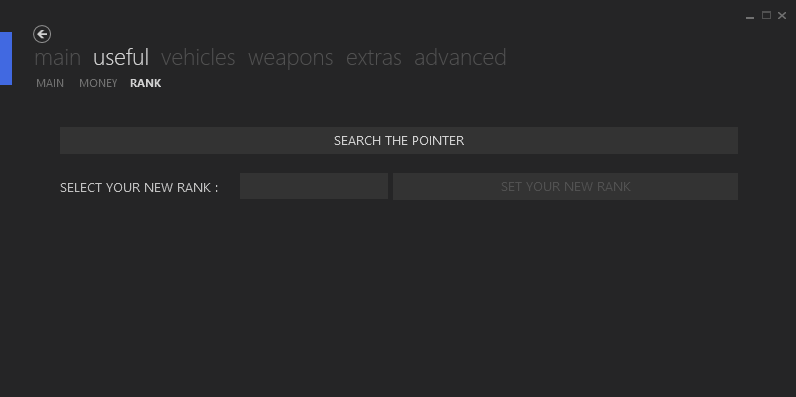
Under the RANK tab, there is only one option. You obviously use this to change your rank. Once again the first thing you must do is Search the pointer by using the button. Once you do this, enter your desired rank in the box provided and then click the "SET YOUR NEW RANK" button. It's as simple as that! One warning from me, I wouldn't set your rank too high as this makes your account look suspicious, and there is a slight chance of being banned. So try to set it at a rank below 300, but once again it's up to you what you do.
![]()
The Vehicles tab. There are a lot of options and things you can do with this feature in MzTool. I will explain how to use all of these features now.
The Garage Editor tab. This tab allows you to edit your garage in real time, without having to buy cars or "tune them up" in Los Santos Customs. Down the left side of the tool you will see all the cars you currently have in your garage. You can select a new Vehicle and it will instantly replace the old one. NOTE: that there are many vehicles that have been banned from being able to mod into your garage, so if the vehicle you choose doesn't show up, you simple can't have it. The rest of the Garage Editor tab is pretty self explanatory, and it basically involves a lot of testing and playing around. NOTE that sometimes the cars will not be insured, even if the Insurance button is checked, so double check that the vehicle is insured.
![]()
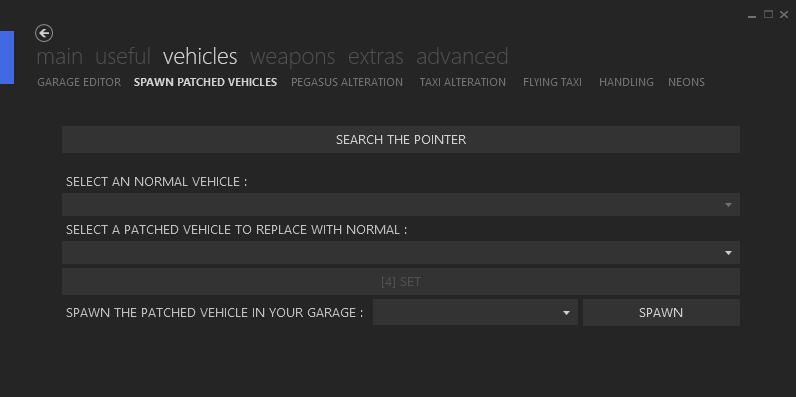
The Spawn Patched Vehicles Tab. First thing's first, click the "SEACH THE POINTER" button. Once the pointer has been found, you must select a normal vehicle. It doesn't matter what vehicle you select. Once you do that, you can select any patched vehicle from the drop down menu, which ever one you desire, and then hit the "SET" button. Now what you have to do is select from the drop down menu which car slot you want this vehicle to spawn in, and then hit the "SPAWN" button. Done! Pretty simple hey? NOTE: Once you turn your playstation off, these Patched Vehicles will disappear and go back to the initial "normal" vehicle you selected.
![]()
The Pegasus Alteration Tab. This tab allows you to change your Pegasus vehicle to any vehicle in the game. Firstly, you want to select a vehicle. The vehicle you select will determine where the altered vehicle will spawn. I usually pick the Titan and do it near Los Santos International Airport. Once you have picked the vehicle from the drop down menu, hit the "SEARCH THE POINTER" button and wait until the pointer has been found. Next what you need to do is select the vehicle that you want to spawn from the next drop down menu, it can be anything... including the Blimp! Once you do that click the "SET" button, and call Pegasus for the initial vehicle that you selected on the first drop down menu. Go to the vehicle and Tada! Your patched and/or altered vehicle will be there for you to enjoy.
![]()
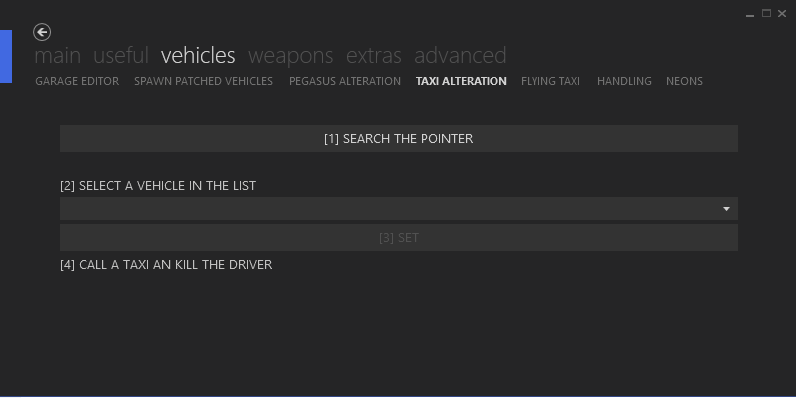
The Taxi Alteration Tab. The Taxi Alteration is basically the same as the Pegasus Alteration, although the vehicle arrives like a taxi would - it replaces it. First of all, use the "SEARCH THE POINTER" button, then you need to pick from the drop down menu your desired vehicle. Hit the "SET" button and then call up a taxi and kill the driver. It's as simple as that!
![]()
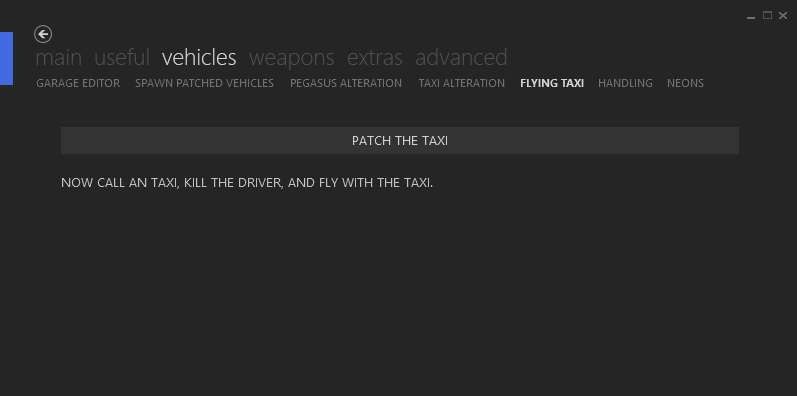
The Flying Taxi Tab. This tab allows you to fly a taxi once you have clicked the "PATCH THE TAXI" button. Once you have done that, call up for a taxi and kill the driver. Get in the driver's seat and fly away!
![]()
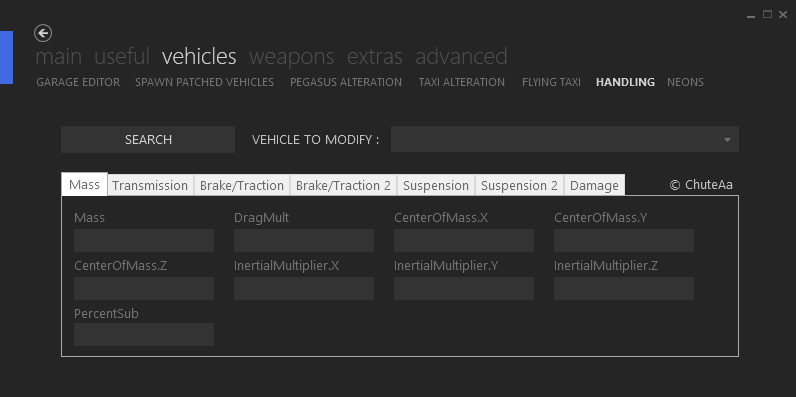
The Handling Tab. This is where things start to get more advanced and it comes down to trial and error. NOTE that if you have any DLC.edat mods, any cars affected by the DLC.edat mod you will not be able to modify as they interfere with each other. If you're not using DLC.edat vehicle mods, then feel free to mess around with the values in the options. First thing is first though, hit the "SEARCH" button, and then select the vehicle that you wish to modify from the drop down menu. Once you have done this, change the values in the textboxes to change the Mass, Transmission, Brakes/Traction, Suspension and Damage. It all comes down to person preference and how you like your cars to be driven, so have a play with this feature and enjoy it!
![]()
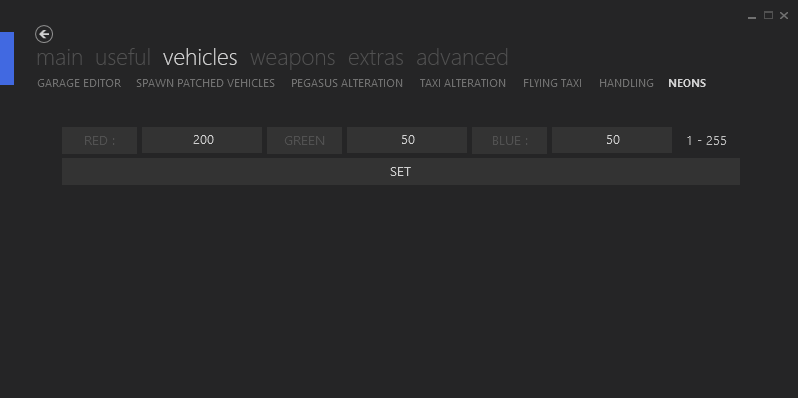
The Neons Tab. This tab allows you to change the interior light colour for your car. Simply enter the values (from 1 - 255) and hit the "SET" button... the interior lights will instantly change! An example, if you want a blue interior for your car, set the red and green values to 1, and the blue value to 255. Once you hit that "SET" button your car will glow like a Diamond!
![]()
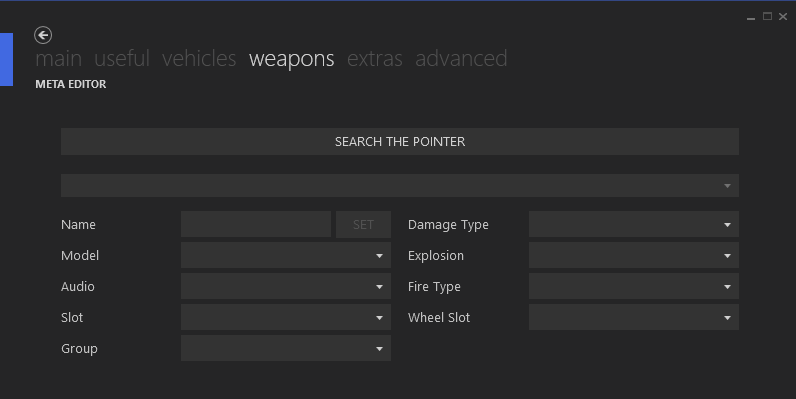
The Weapons Tab is all good fun, but keep in mind that you can NOT modify a weapon that has already been modified in any DLC.edat file mods. This is an important thing to keep in mind. But first thing is first, once again hit that "SEARCH THE POINTER" button and wait until the pointer has been found. Then select from the drop down menu which weapon you wish to edit (keeping in mind it can't be a weapon that has already been edited in any DLC.edat mod). Once you have selected your desired weapon, go to the "Damage Type" drop down menu and click on the "EXPLOSIVE" option. Once you have done this go to the drop down menu located below, the "Explosion" menu, and select which mod you want your weapon to have. Once again, this weapon editor comes down to trial and error so use your imagination and see what amazing weapons you can come up with!
![]()
The Extras Tab has three sub-tabs that you can use. They will be explained below.
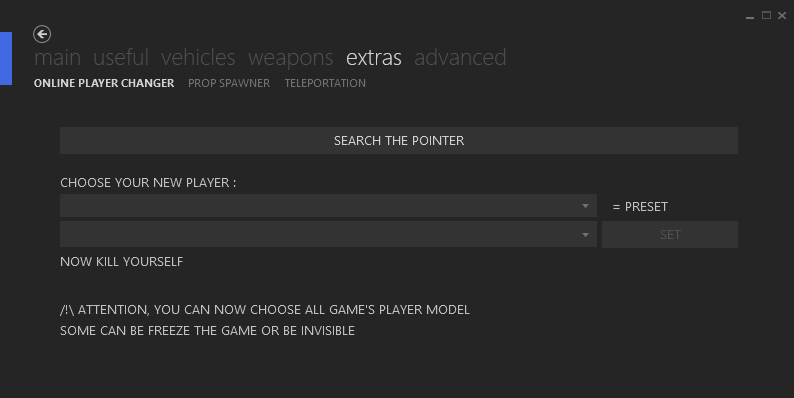
The Online Player Changer Tab. This tab allows you to change your look into any character in the game. NOTE: Some of the models can cause your game to freeze, or you will simply be invisible. First thing is first, as usual, Search that pointer until it is found. Once the pointer has been found you can select your desired model that you wish to change in to. There are presets ready for you to use, or you can choose your own model, which ever one you want, and then hit the "SET" button. Once you have hit the set button you have to kill yourself in game. NOTE: You will not have any weapons when you re-spawn, but once you join another session you will have these weapons until you die next.
![]()
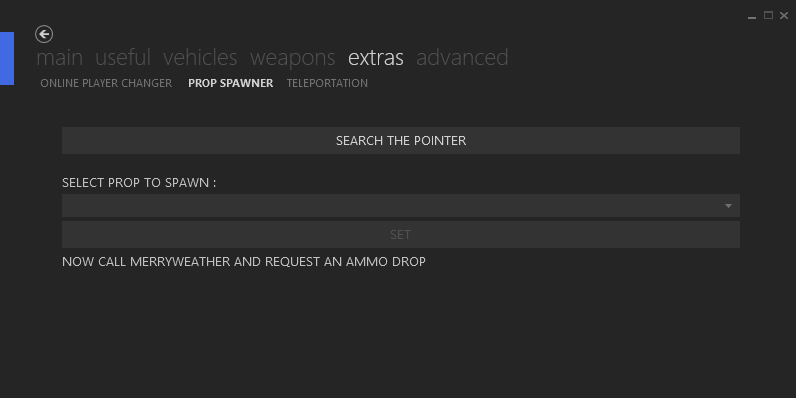
The Prop Spawner Tab. This tab allows you to spawn any listed prop at your exact location, at any time. First of all, push the "SEARCH THE POINTER" button. Once the pointer has been found, select from the drop down menu which prop you would like to spawn, and hit the "SET" button. The next step is to call an ammo drop from MerryWeather and your prop will fall from the sky!
![]()
The Teleportation Tab. This tab is extremely easy to use but also extremely fun and helpful. In game, you need to set a waypoint on your map. Once you have set this waypoint, you need to back out of the pause menu and hit the "TELEPORTATION" button on MzTool. Once you have done this, move forward a tad and you will teleport instantly your already selected waypoint! NOTE: you do fall for a few seconds, but then you will spawn on the land. You can do this in a vehicle, but if you teleport in the vehicle you must get out when you are falling under the map. Then both you and the vehicle will spawn on the map and you're set to go!
![]()
The Advanced Tab has a lot of options to it, and just like the Handling tab under the Vehicles section it basically comes down to personal preference and how you want to modify the game.
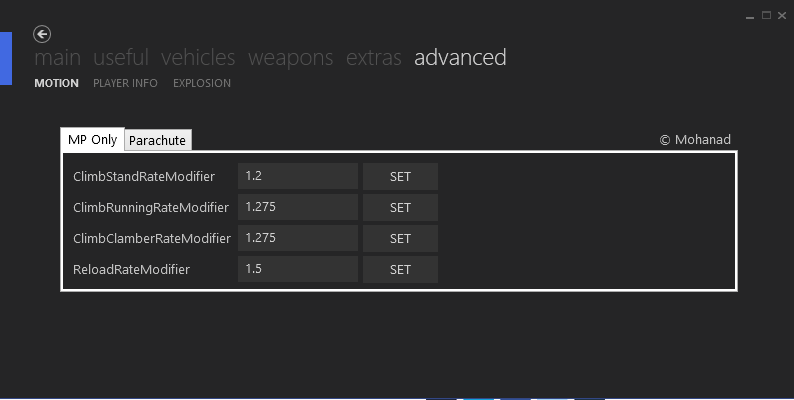
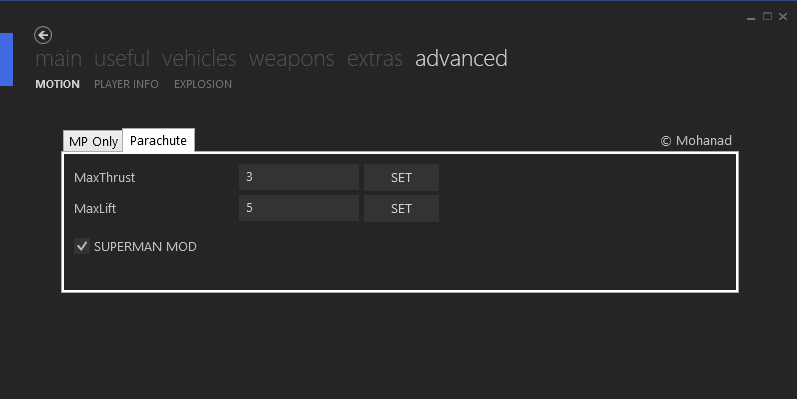
The Motion Tab. The Motion tab allows you to alter how your player moves/reloads/falls. You can input your desired values into the boxes provided and hit the "SET" button to apply the modifications to your player. There is a preset button under the Parachute tab which enables the Superman Mod. Once you have clicked this mod, jump from a high place with a parachute on your back and pull the left analog stick up. You are now flying like superman! Play around with this feature to perfect it, trust me it's great fun.
![]()
![]()
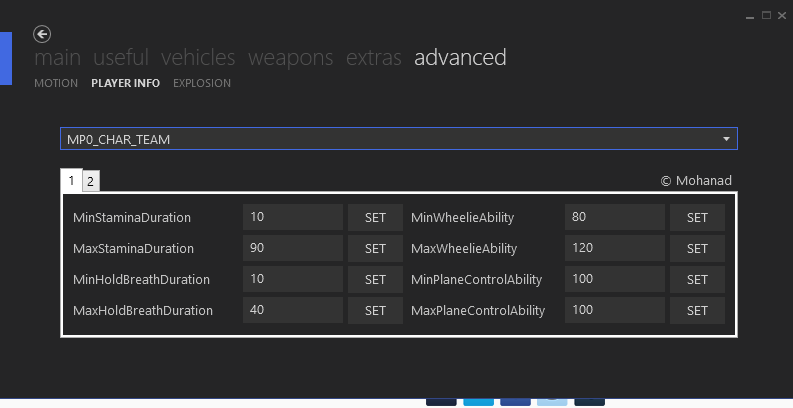
The Player Info Tab. This tab enables you to edit your player info, first of all select which player/character you wish to modify from the drop down menu and then input your desired values. Once again it comes down to personal preference and how you want your stats to be set, so it's up to you to test this feature.
![]()
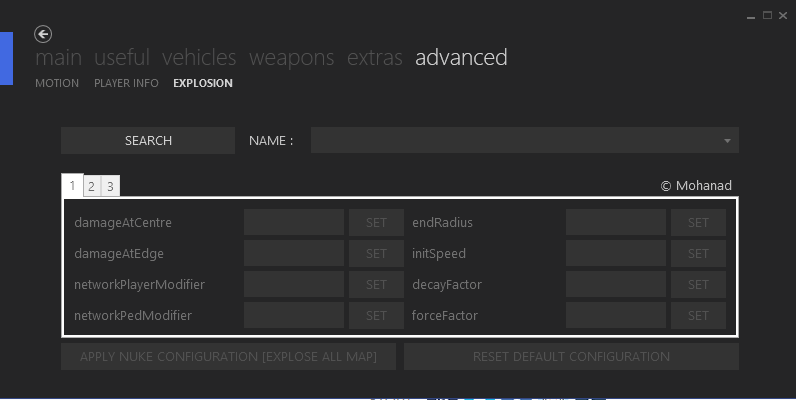
Last but not least, The Explosion Tab. First of all you must click the "SEARCH" button. After that, you have to select your desired weapon from the drop down menu. I suggest using the Sticky Bomb. If you're looking for an explosion that blows up the whole map, click the "APPLY NUKE CONFIGURATION [EXPLODE ALL MAP] button, and there is also a reset to default button too. If you want to use your own values, it comes down to trial and error once again. Input the values you want and just play around with the options, and don't forget to hit that "SET" button. Once you have done all of this, throw down a sticky bomb (or whatever weapon you chose from the drop down menu) and explode it. The outcome depends on what values have been set.
![]()
So that's about it, if I missed anything just leave a message in the comment section. I hope this helped out for those people who were not sure how to use some of the features in MzTool as it is such an amazing tool! Enjoy!
Please leave a thanks/rep as it took a long time to type this up and put this together, i would appreciate that. Thanks :D
Hey guys, here is a Tutorial on how to use MzTool. Most of it is pretty self explanatory, but I will still be going over everything and explaining how to use all of the features of this tool. So lets get straight in to it!
NOTE: MzTool is available for free if you have NGU Elite.
First of all, for full use of this tool you must have CCAPI V2.50 installed on your PS3. There are many tutorials around on how to do this, so if you haven't already... install CCAPI V2.50.
Once you have entered your username and password, you will be prompted to enter your PS3's IP address. Once you have entered your IP hit the CONNECT and ATTACH buttons. MzTool is now ready to use.
Navigate your way to the "useful" tab. This tab contains many useful mods when it comes to modding GTA V. The useful tab is very simple to use.
Lets start with the MAIN tab... there are many options in the MAIN tab. For the checkboxes, simply click them to activate them (it will be ticked if the mod is turned on), and click it again to deactivate the mod. There are also drop down menus where there are many options. Click on the drop down menu to see the options, select one and the mod will be active in game. As for the name changer option, you can type the name of someone else in your session in that box and hit the "!" button to change your name. NOTE that only you can see that your name has changed, but the game will think that you are now this player. Play around with this, you can do things like give cars away etc, it's just a matter of experimenting.
Next comes the MONEY tab. Be cautious when modding money into the game, there are ways that can be detected by Rockstar and you could potentially be banned. The first thing you need to do once you are in the MONEY tab is to click the "SEARCH THE POINTER" button. Once the pointer has been found, you are free to mod the money into the game. My recommendation is that you use the "JACKPOT METHOD". By using this method, your GTA V Online account gets sent $10,000 at a time. This means it is much less detectible and lessens the chance of receiving a ban. The other button, "BIG MONEY", gives you a lot of money instantly. Rockstar can detect this easily and you will most likely get banned. This method is NOT recommended, but in the end it's up to you.
Under the RANK tab, there is only one option. You obviously use this to change your rank. Once again the first thing you must do is Search the pointer by using the button. Once you do this, enter your desired rank in the box provided and then click the "SET YOUR NEW RANK" button. It's as simple as that! One warning from me, I wouldn't set your rank too high as this makes your account look suspicious, and there is a slight chance of being banned. So try to set it at a rank below 300, but once again it's up to you what you do.
The Vehicles tab. There are a lot of options and things you can do with this feature in MzTool. I will explain how to use all of these features now.
The Garage Editor tab. This tab allows you to edit your garage in real time, without having to buy cars or "tune them up" in Los Santos Customs. Down the left side of the tool you will see all the cars you currently have in your garage. You can select a new Vehicle and it will instantly replace the old one. NOTE: that there are many vehicles that have been banned from being able to mod into your garage, so if the vehicle you choose doesn't show up, you simple can't have it. The rest of the Garage Editor tab is pretty self explanatory, and it basically involves a lot of testing and playing around. NOTE that sometimes the cars will not be insured, even if the Insurance button is checked, so double check that the vehicle is insured.

The Spawn Patched Vehicles Tab. First thing's first, click the "SEACH THE POINTER" button. Once the pointer has been found, you must select a normal vehicle. It doesn't matter what vehicle you select. Once you do that, you can select any patched vehicle from the drop down menu, which ever one you desire, and then hit the "SET" button. Now what you have to do is select from the drop down menu which car slot you want this vehicle to spawn in, and then hit the "SPAWN" button. Done! Pretty simple hey? NOTE: Once you turn your playstation off, these Patched Vehicles will disappear and go back to the initial "normal" vehicle you selected.
The Pegasus Alteration Tab. This tab allows you to change your Pegasus vehicle to any vehicle in the game. Firstly, you want to select a vehicle. The vehicle you select will determine where the altered vehicle will spawn. I usually pick the Titan and do it near Los Santos International Airport. Once you have picked the vehicle from the drop down menu, hit the "SEARCH THE POINTER" button and wait until the pointer has been found. Next what you need to do is select the vehicle that you want to spawn from the next drop down menu, it can be anything... including the Blimp! Once you do that click the "SET" button, and call Pegasus for the initial vehicle that you selected on the first drop down menu. Go to the vehicle and Tada! Your patched and/or altered vehicle will be there for you to enjoy.

The Taxi Alteration Tab. The Taxi Alteration is basically the same as the Pegasus Alteration, although the vehicle arrives like a taxi would - it replaces it. First of all, use the "SEARCH THE POINTER" button, then you need to pick from the drop down menu your desired vehicle. Hit the "SET" button and then call up a taxi and kill the driver. It's as simple as that!
The Flying Taxi Tab. This tab allows you to fly a taxi once you have clicked the "PATCH THE TAXI" button. Once you have done that, call up for a taxi and kill the driver. Get in the driver's seat and fly away!
The Handling Tab. This is where things start to get more advanced and it comes down to trial and error. NOTE that if you have any DLC.edat mods, any cars affected by the DLC.edat mod you will not be able to modify as they interfere with each other. If you're not using DLC.edat vehicle mods, then feel free to mess around with the values in the options. First thing is first though, hit the "SEARCH" button, and then select the vehicle that you wish to modify from the drop down menu. Once you have done this, change the values in the textboxes to change the Mass, Transmission, Brakes/Traction, Suspension and Damage. It all comes down to person preference and how you like your cars to be driven, so have a play with this feature and enjoy it!
The Neons Tab. This tab allows you to change the interior light colour for your car. Simply enter the values (from 1 - 255) and hit the "SET" button... the interior lights will instantly change! An example, if you want a blue interior for your car, set the red and green values to 1, and the blue value to 255. Once you hit that "SET" button your car will glow like a Diamond!
The Weapons Tab is all good fun, but keep in mind that you can NOT modify a weapon that has already been modified in any DLC.edat file mods. This is an important thing to keep in mind. But first thing is first, once again hit that "SEARCH THE POINTER" button and wait until the pointer has been found. Then select from the drop down menu which weapon you wish to edit (keeping in mind it can't be a weapon that has already been edited in any DLC.edat mod). Once you have selected your desired weapon, go to the "Damage Type" drop down menu and click on the "EXPLOSIVE" option. Once you have done this go to the drop down menu located below, the "Explosion" menu, and select which mod you want your weapon to have. Once again, this weapon editor comes down to trial and error so use your imagination and see what amazing weapons you can come up with!
The Extras Tab has three sub-tabs that you can use. They will be explained below.
The Online Player Changer Tab. This tab allows you to change your look into any character in the game. NOTE: Some of the models can cause your game to freeze, or you will simply be invisible. First thing is first, as usual, Search that pointer until it is found. Once the pointer has been found you can select your desired model that you wish to change in to. There are presets ready for you to use, or you can choose your own model, which ever one you want, and then hit the "SET" button. Once you have hit the set button you have to kill yourself in game. NOTE: You will not have any weapons when you re-spawn, but once you join another session you will have these weapons until you die next.
The Prop Spawner Tab. This tab allows you to spawn any listed prop at your exact location, at any time. First of all, push the "SEARCH THE POINTER" button. Once the pointer has been found, select from the drop down menu which prop you would like to spawn, and hit the "SET" button. The next step is to call an ammo drop from MerryWeather and your prop will fall from the sky!
The Teleportation Tab. This tab is extremely easy to use but also extremely fun and helpful. In game, you need to set a waypoint on your map. Once you have set this waypoint, you need to back out of the pause menu and hit the "TELEPORTATION" button on MzTool. Once you have done this, move forward a tad and you will teleport instantly your already selected waypoint! NOTE: you do fall for a few seconds, but then you will spawn on the land. You can do this in a vehicle, but if you teleport in the vehicle you must get out when you are falling under the map. Then both you and the vehicle will spawn on the map and you're set to go!

The Advanced Tab has a lot of options to it, and just like the Handling tab under the Vehicles section it basically comes down to personal preference and how you want to modify the game.
The Motion Tab. The Motion tab allows you to alter how your player moves/reloads/falls. You can input your desired values into the boxes provided and hit the "SET" button to apply the modifications to your player. There is a preset button under the Parachute tab which enables the Superman Mod. Once you have clicked this mod, jump from a high place with a parachute on your back and pull the left analog stick up. You are now flying like superman! Play around with this feature to perfect it, trust me it's great fun.
The Player Info Tab. This tab enables you to edit your player info, first of all select which player/character you wish to modify from the drop down menu and then input your desired values. Once again it comes down to personal preference and how you want your stats to be set, so it's up to you to test this feature.
Last but not least, The Explosion Tab. First of all you must click the "SEARCH" button. After that, you have to select your desired weapon from the drop down menu. I suggest using the Sticky Bomb. If you're looking for an explosion that blows up the whole map, click the "APPLY NUKE CONFIGURATION [EXPLODE ALL MAP] button, and there is also a reset to default button too. If you want to use your own values, it comes down to trial and error once again. Input the values you want and just play around with the options, and don't forget to hit that "SET" button. Once you have done all of this, throw down a sticky bomb (or whatever weapon you chose from the drop down menu) and explode it. The outcome depends on what values have been set.
So that's about it, if I missed anything just leave a message in the comment section. I hope this helped out for those people who were not sure how to use some of the features in MzTool as it is such an amazing tool! Enjoy!
Please leave a thanks/rep as it took a long time to type this up and put this together, i would appreciate that. Thanks :D